If you've been thinking about baking your own bread but aren't sure where to start, a pullman loaf pan is the best place to begin. It gives your dough structure, helps it rise evenly, and produces a loaf that slices like bread should – without the free-form shaping that puts a lot of beginners off.
And honestly? The smell alone is worth it. There is nothing quite like the scent of bread baking in the oven – it fills the whole house and has everyone in the kitchen asking when it'll be ready. With the cost of living putting pressure on the weekly shop, making your own bread is one of those small shifts that genuinely helps the household budget. A homemade loaf costs a fraction of what you'd pay at a bakery, and once you've got the basics down, it becomes one of the most satisfying and practical things you can do in your own kitchen.
This guide covers the whole process: what's happening inside the oven while your bread bakes, how to get the best out of a Pullman tin, and the small things that make a real difference to the final loaf.
What actually happens when bread bakes
It helps to know what's going on inside the oven, because once you do, a lot of common bread problems start to make sense.
The moment your dough goes in, the yeast gets one last burst of activity from the heat. It produces gas, the loaf lifts, and that rise is called oven spring. At the same time, the structure of the bread starts to set. Proteins firm up, starches absorb moisture, and a crust begins forming on the outside.
For a good loaf, all of this needs to happen at a similar pace throughout the dough. If the outside sets too quickly, the loaf can't expand properly. If some parts of the dough heat faster than others, you end up with an uneven crumb, a gummy centre, or a crust that's set on one side before the other has caught up.
The pan is doing more than just holding the dough in shape. It influences how heat reaches the base and sides of the loaf, and how consistently it does so the whole way through the bake.
Why even heat matters more than most recipes let on
When a loaf doesn't turn out right, most people look at the dough first. The yeast, the hydration, the proving time. And those things do matter. But the pan is often the quiet culprit that nobody thinks to question.
A pan that creates hot spots – common with thin or uncoated dark metal – can overbrown the base or edges while leaving the centre undercooked. You end up adjusting without realising it: longer bake times, lower temperatures, rotating the pan halfway through. These all work as workarounds, but they're compensating for inconsistency in the tin itself.
When heat moves evenly across the base and sides, the dough has space to rise fully before the structure sets. The crumb develops more consistently, and the crust forms without rushing ahead of the interior. That's when you get a loaf that looks and tastes the way it should.
Why stainless steel is so good for baking bread at home
Stainless steel heats steadily and evenly, which is exactly what bread dough needs. Rather than responding quickly in isolated spots, it warms consistently across the whole surface of the pan. No hot spots, no burnt corners, no guessing.
It's also non-reactive, which is worth knowing if you bake sourdough. Acidic doughs can interact with lower-quality metals over time. Stainless steel isn't affected by this, so it's just as reliable on your hundredth bake as it was on your first.
Unlike non-stick pans, there's no coating to worry about degrading or flaking at high temperatures. Our pans are made from 18/8 (304) food-grade stainless steel, free from PFOA and any chemical coatings. Just clean, durable metal that does its job reliably.
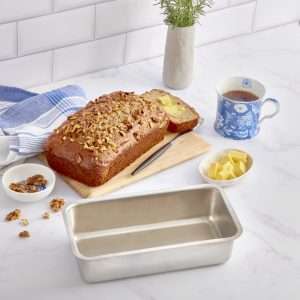
Our Stainless Steel Pullman Bread Pan with Lid is built for bread bakers who want consistent, repeatable results. For more everyday baking – banana bread, quick loaves, simple sandwich loaves – our Stainless Steel Loaf Pan is the versatile everyday option.
What is a Pullman pan and do you actually need one?
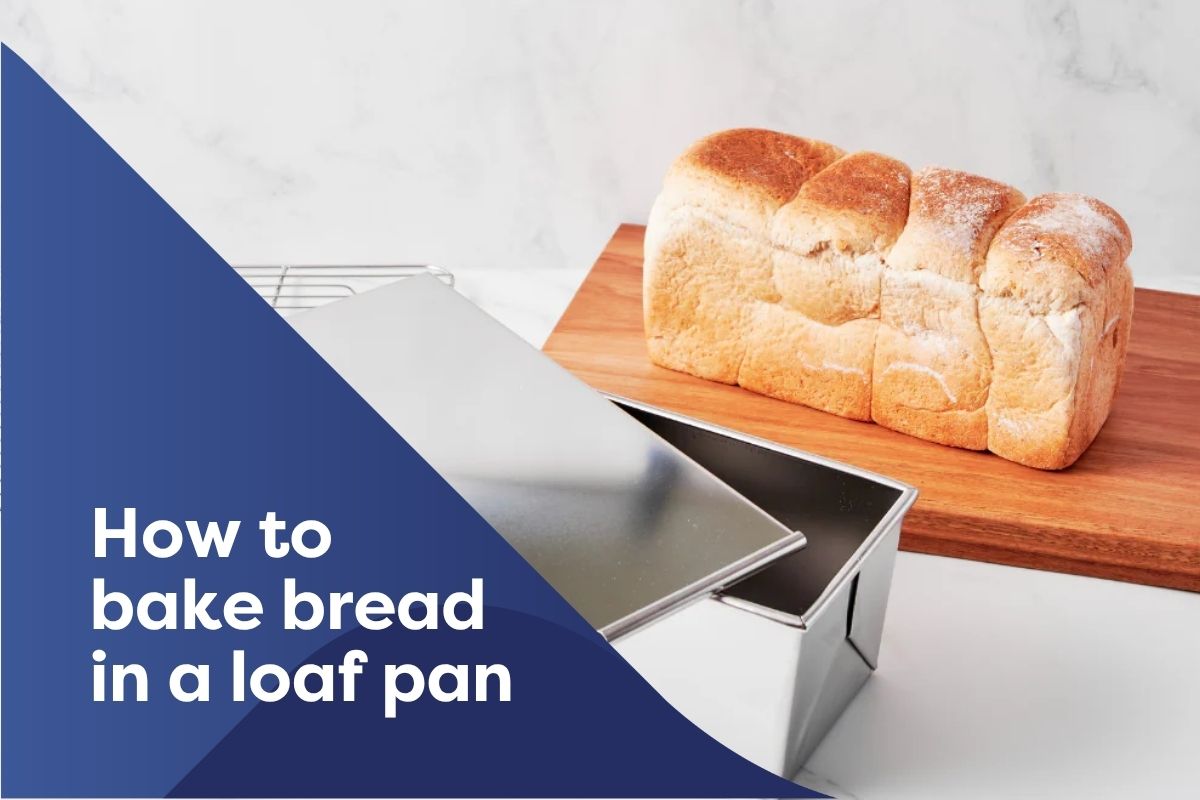
A Pullman pan is a rectangular loaf tin with a sliding lid. The lid fits snugly over the top of the pan during baking, which gently contains the rise and produces a loaf with straight sides and a flat, even top. The kind of loaf that slices cleanly, stacks neatly, and mimics the shape of store-bought loaves to satisfy even the fussiest of sandwich eaters.
The name comes from Pullman train cars, where compact rectangular loaves were baked to fit efficiently into small galley kitchens. These days, the Pullman shape has become a favourite for home bakers who want that clean, uniform result without the irregular dome you sometimes get from an open tin.
The lid does two useful things. First, it controls the rise, directing the dough upward and outward evenly rather than letting it balloon unevenly in the centre. Second, it traps some steam during the early part of the bake, which keeps the crust softer and gives the crumb more time to develop before any hardening sets in.
It's not about forcing the dough into a particular shape. It's just giving it the right conditions to bake evenly.
  |
 |
 |
How to bake bread in a loaf pan, step by step
This applies whether you're using a standard loaf pan or the Pullman bread pan.
1. Prepare your pan
Lightly grease the interior with butter, olive oil, or coconut oil. If you're using the Pullman, grease the inside of the lid as well. This is especially important while you're still getting a feel for the right dough volume. Some bakers add a light dusting of flour over the oil as extra insurance, and it's a habit worth picking up
2. Use the right amount of dough
This is probably the most common question people have about the Pullman: how full should it be?
The general guide is to fill the pan about 60–70% full before the final proof. The dough will expand to fill the remaining space as it proves and bakes. Too much and the lid won't close properly. Too little and the loaf won't reach the lid, so you lose the flat-top result.
It usually takes a bake or two to dial in the amount for your specific recipe. That's completely normal and nothing to worry about. Use our dough cutters to help you get even portions.
3. Decide where to do your final proof
Both in and out of the pan work fine. Most sandwich-style recipes are proofed directly in the pan, which is the simplest approach. Sourdough bakers often prove in a banneton and transfer to the pan just before baking.
If you're doing an overnight cold proof, leaving the dough in the fridge to develop flavour, bring the loaf to room temperature before putting it in the oven. One of our community bakers who works with spelt flour found this made a noticeable difference to her final rise.
4. Preheat the oven (and the pan)
Preheat your oven to whatever temperature your recipe calls for. For most sandwich loaves and enriched breads, that's around 180–200°C. Sourdough typically goes in at 220–230°C.
For best results, put the Pullman pan in the oven during preheat. It can help with oven spring. Just be careful picking it up.
5. Slide the lid on
Put the lid in place just before you put the pan in the oven. It should sit flat and snug. It doesn't need to be locked or weighted; the design keeps it in place during baking.
One handy tip from our community: at around the 10-minute mark, you can open the lid briefly and score a line across the centre of the loaf. This helps it rise more evenly rather than splitting to one side. It's not essential, but once you've tried it a couple of times, it becomes second nature.
How long does it take to bake bread?
This varies depending on the bread type, your oven, and the size of the loaf. Here are some reliable starting points based on our pullman pan or loaf pan:
|
Bread type |
Temperature |
Approximate time |
|
Standard white sandwich loaf |
180°C |
30-35 minutes with lid, then 5-10 minutes without the lid |
|
Enriched loaf (milk, butter, eggs) |
170-180°C |
30-40 minutes |
|
Sourdough |
220°C |
35-45 minutes |
|
No-knead loaf |
200°C |
40-50 minutes |
|
Wholegrain or wholemeal |
190°C |
35-45 minutes |
The most reliable way to check is a probe thermometer. A fully baked loaf should read 93–97°C in the centre. If you don't have one, tap the bottom of the loaf out of the pan. It should sound hollow.
Decide whether to finish with the lid off
If you want the classic Pullman shape, keep the lid on for the full bake. If you'd prefer a slightly more golden top crust, take the lid off for the last 5–10 minutes. Both are perfectly valid; it's just a matter of preference.
Let it cool before you slice it
This step is worth taking seriously. Leave your loaf on a wire rack for at least 30–40 minutes before cutting in. The crumb is still setting as the loaf cools, and slicing too early compresses it into a gummy texture. Give it time and it rewards you with a clean, even slice.
|
|
|


How different breads behave in a pan
Different doughs have different needs, and it's worth knowing what to expect.
Sandwich bread is what the Pullman was designed for. A classic white, wholegrain, or milk loaf does beautifully here. The structure keeps the rise even and gives you that satisfying, uniform slice.
Sourdough in a tin produces a softer crust and a more consistent crumb than a free-form loaf. If you're still building your shaping skills or just want a more predictable result, baking sourdough in a tin is a genuinely good option rather than a compromise.
No-knead bread benefits a lot from the structure of a pan with straight sides. These are wetter doughs that will spread if given the chance; the tin holds them in shape while the even heat takes care of the rest.
Enriched doughs like brioche and milk bread brown quickly because of the sugar and fat content. Even heat distribution is particularly important here, giving the interior enough time to bake through before the outside darkens too far. If your oven runs hot, reduce the temperature by 10–15°C.
Banana bread and quick loaves are perfect for our standard Stainless Steel Loaf Pan. Several of our customers have mentioned that banana bread bakes more evenly in stainless steel than in dark or non-stick pans, with no burnt edges and a properly golden top.
When things don't go to plan
Every baker has a bad loaf at some point. Here's a quick reference for common problems.
- Dense crumb or poor rise: Usually under-proofed dough, yeast past its use-by date, or not enough gluten development. The pan is rarely the cause here unless you're dealing with significant hot spots.
- Gummy centre: Either underbaked, or sliced before it had time to cool properly. Check with a thermometer, or give it more time on the rack.
- Crust browning too fast: Oven temperature is too high, or the dough is high in sugar. Tent with foil or reduce the temperature slightly.
- Loaf stuck to the pan: Not enough greasing. Make sure you're coating the sides as well as the base. For the Pullman, grease the lid too.
- Lid wouldn't close: Too much dough in the pan. Try reducing the dough weight by 50–100g next time.
- Loaf sweated after resting: Condensation under the crust as steam escapes is common with tin-baked bread. Cool your loaf on a wire rack, uncovered, so the moisture can dissipate rather than settle.
Looking after your pan
Stainless steel is genuinely easy to care for. Let the pan cool before washing. If anything has stuck, a short soak in warm soapy water usually does the job, though with good greasing most loaves release cleanly. Both our Pullman pan and standard loaf pan are dishwasher safe.
Over time, your pan will develop a natural patina from use. This is completely normal and has no effect on how it performs. It's just what a well-used pan looks like.
Which pan is right for you?
If you bake bread regularly and want consistent, clean results with a proper sandwich shape, the Pullman pan is worth it. It takes the guesswork out of the rise and produces a loaf that looks like it came from a good bakery (at a fraction of the cost).
If you bake a mix of things and want one pan that handles bread, banana cake, slices, and everything in between, our Stainless Steel Loaf Pan is the one to reach for.
Both are 18/8 food-grade stainless steel, no coatings, no PFOA, nothing you'd rather not have touching your food.