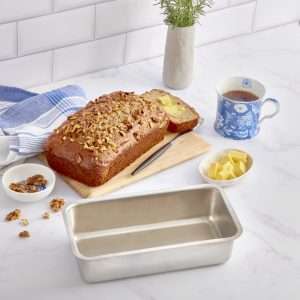
There’s nothing quite like pulling a tray of muffins out of the oven... only to have them crumble apart as you attempt to pull them out. Or scraping roasted veggies out of the tray, wondering if they were ever meant to be crispy... or are they just stuck...
Stainless steel bakeware might look sleek and sturdy, but without the right prep, it can leave even the most careful home cook feeling frustrated. And if you’ve recently switched from non-stick? It’s easy to assume you’re doing something wrong.
But the truth is, stainless steel just works differently. And once you understand why food sticks (and how to prevent it) you’ll get consistent, non-stick results, without the mess.
At The Low Tox Project, we specialise in stainless steel bakeware designed for everyday use – no coatings, no fuss, just real results. We’ve supported thousands of home cooks through the sticky learning curve and know what works when it comes to safer, longer-lasting baking. Here's what we’ve learned along the way.
Why stainless steel can stick
Unlike non-stick bakeware, which uses chemical coatings to repel food, stainless steel is uncoated, which is exactly what makes it a safer, longer-lasting option. But without that artificial barrier, you’ll need to create one using a few tried-and-true techniques.
A few things can impact sticking:
- The recipe ingredients
- How much oil or grease you use
- Oven temperature (or uneven heating)
- Sugar content, liquid ratios or flour types
If you’ve had mixed results, don’t give up. A little trial and error is completely normal, and once you’ve got the hang of it, you’ll wonder why you ever used anything else.
1. Preheat your bakeware
This one makes a big difference. Cold stainless steel can cause food to seize and stick, especially in recipes with sugar or moisture. It can also warp slightly if it goes straight from a cool kitchen to a hot oven. Instead, place your tray or tin into the oven while it preheats, then carefully remove and grease it before adding your batter or veggies. (Do not add frozen items to a warm tray as it will instantly warp)
This helps reduce sticking and encourages even baking from the start. As every oven heats up differently, please take note of your ideal warm-up time and be careful not to burn yourself as you grease.
2. Grease generously (yes, more than you think)
Greasing is essential with stainless steel and we mean more than just a quick swipe. Coat the base and edges of your tray thoroughly, paying extra attention to corners and curves. This is especially important with muffins, cakes or slices.
Use natural fats like:
- Butter
- Olive oil
- Coconut oil
- Ghee
You can also use a pastry brush or clean fingers to make sure it’s evenly distributed.
3. Dust with flour or alternatives
For cakes, slices, or any recipe where you want a clean release, follow your greasing with a light dusting. Flour works well, but depending on the recipe, you could also use:
- Cocoa powder (for chocolate bakes)
- Almond meal
- Desiccated coconut
- Breadcrumbs (for savoury loaves or bakes)
This creates a physical barrier between your food and the pan, especially helpful with more delicate or lower-gluten recipes.
4. Adjust your recipe if needed
Some recipes are just more prone to sticking. If you’re working with alternative flours, low sugar or no eggs, it might take a few tweaks to get a perfect result.
Here’s what to keep in mind:
- High sugar: can caramelise and stick to the tray. Reduce slightly if you’re having issues.
- Wet batters: too much liquid can pool and bake unevenly. Try adjusting the ratios.
- Nut meals or wholegrain flours: These absorb moisture differently and can result in a more fragile structure. That’s where generous greasing (and sometimes lining) helps.
5. Let your bake rest before removing
It’s tempting to tip muffins or cakes out right away, but a short rest can make all the difference. Stainless steel retains heat, so letting your bake cool for 5–10 minutes allows steam to release and the structure to firm up, helping it pull away more easily from the sides.
This tip is especially useful for cakes, slices and muffins, where a little patience means cleaner edges and less chance of breaking or crumbling. If needed, gently run a butter knife around the edges before turning out.
6. Rotate halfway through baking
If your oven runs a little hot (or has known hot spots), rotating your tray halfway through can prevent burnt edges and uneven sticking. It’s a simple step that often makes a noticeable difference, especially for slices, roast veggies or cakes.
Why switch to stainless steel?
There’s a learning curve, sure. But once you’re familiar with how stainless steel behaves, it offers benefits you just don’t get with coated bakeware:
- Non-toxic: no synthetic coatings or chemical residues.
- Sustainable: recyclable, long-lasting and low waste.
- Reliable: oven-safe, dishwasher-safe, and designed to last for years.
- Safe for the whole family: especially important if you’re trying to reduce exposure to endocrine disruptors found in some non-stick surfaces.
Still getting stuck?
Every kitchen is different. Every oven is different. Every chef is different. If you’re still finding your muffins, cakes or roast veggies are sticking, try making these changes:
- Checking your oven temperature (a thermometer can help here)
- Adding a bit more oil or adjusting your grease-and-dust technique
- Soaking your tray in warm water after baking for easier clean-up
Take a look at our stainless steel cleaning guide or our common stainless steel issues guide to give you helpful tips and real-life troubleshooting advice.
Real results take real practice
Getting used to stainless steel can take a bit of trial and error, but once you find your groove, it’s easy. Cleaner ingredients, easier maintenance, and fewer single-use products – it’s a small kitchen swap that supports bigger health and sustainability goals.
For more tips and low tox advice, explore our Insights section or shop our collection of stainless steel products – designed to support real kitchens and real life.